
How To Prepare For Scorpion Pincha
Pincha Mayurasana (Forearm Stand) is an inversion that many yogis aspire to unlock in their practice. But what makes Pincha so hard for many is that it requires having open chest and shoulders as well as fairly good push strength. If you are someone who presents with tightness in your shoulders and across your chest and are struggling with finding balance on your forearms, you may have more success trying to balance with Scorpion Pincha.
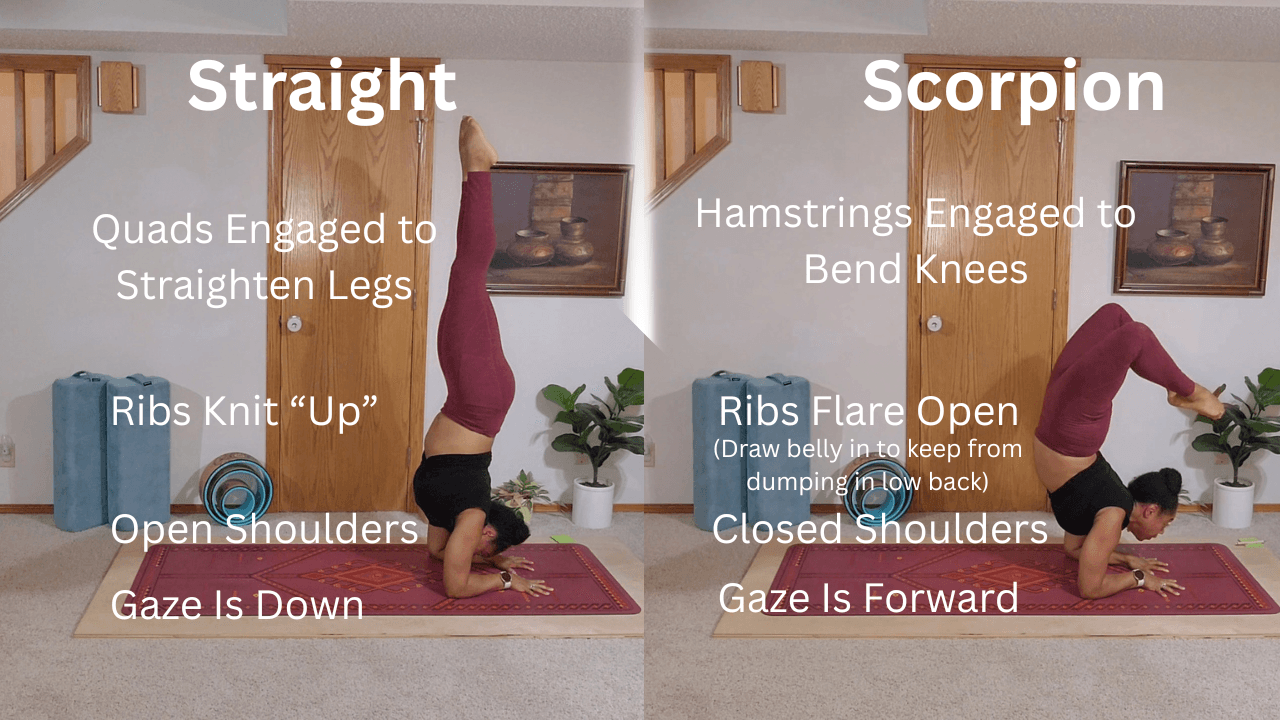
For some, the scorpion shape is easier to hold because it is closed shoulder friendly. In fact, closed shoulders are key to creating the scorpion shape. Closed shoulders refers to the angle between your upper arms and your ribs are less than 180 degrees with your chest pulling forward. However, it does also include being able to access a backbend (extension) in the cervical and thoracic spine. Since your gaze in scorpion is forward instead of down, it also offers your more space between your face and the floor.
Regarding the lower body, instead of your legs going straight up, your knees are bent as you pull your heels to your butt activating your hamstrings. Your legs and chest counter balance each other to maintain the balance instead of hips slightly past shoulders as you would for straight.
12 Poses To Prepare Your Body For Scorpion Pincha
To set yourself up for success, it is best to adequately warm up your body for both back bending and balancing on your forearms. Below are 12 poses that can be used to prepare your body for tackling Scorpion Pincha Mayurasana. You can mix and arrange the poses to make your own sequence, or simply move through each pose in the order listed. Hold each pose for 3 - 5 breaths being sure to practice both sides as applicable. After you are warmed up and ready to try, you can kick to a wall if you are uncomfortable practicing in the middle of the room.
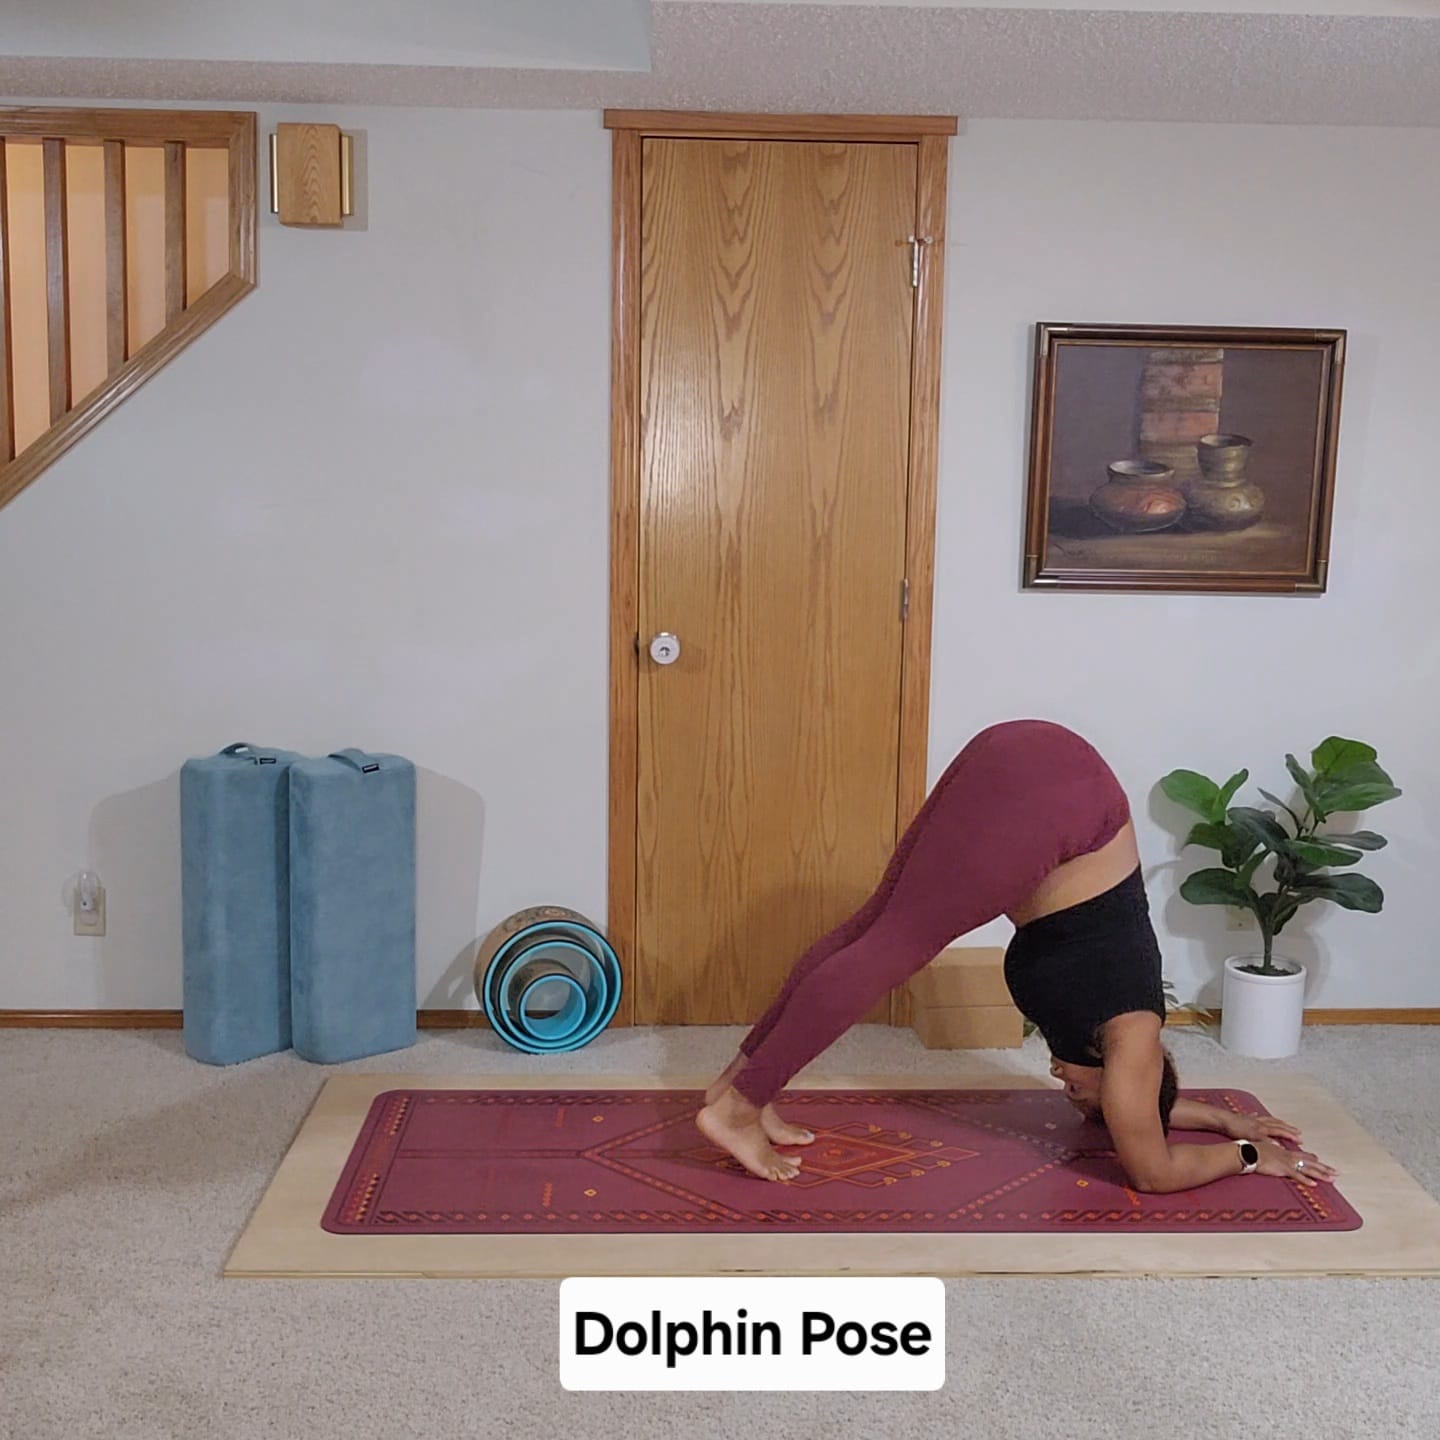
Starting in a forearm plank with your shoulders stacked over you elbows, start to walk your feet toward your face as far as you are able while piking your hips up to the sky. Press your hands and forearms firmly into the floor as you press our chest toward your thighs as you reach your heels toward the ground ( they do not need to touch ). Option to bring your lower arms closer to the center of your mat allowing your thumbs to come closer together , being mindful to hug the upper arms and elbows in, to keep them from sliding to toward the outer edges.
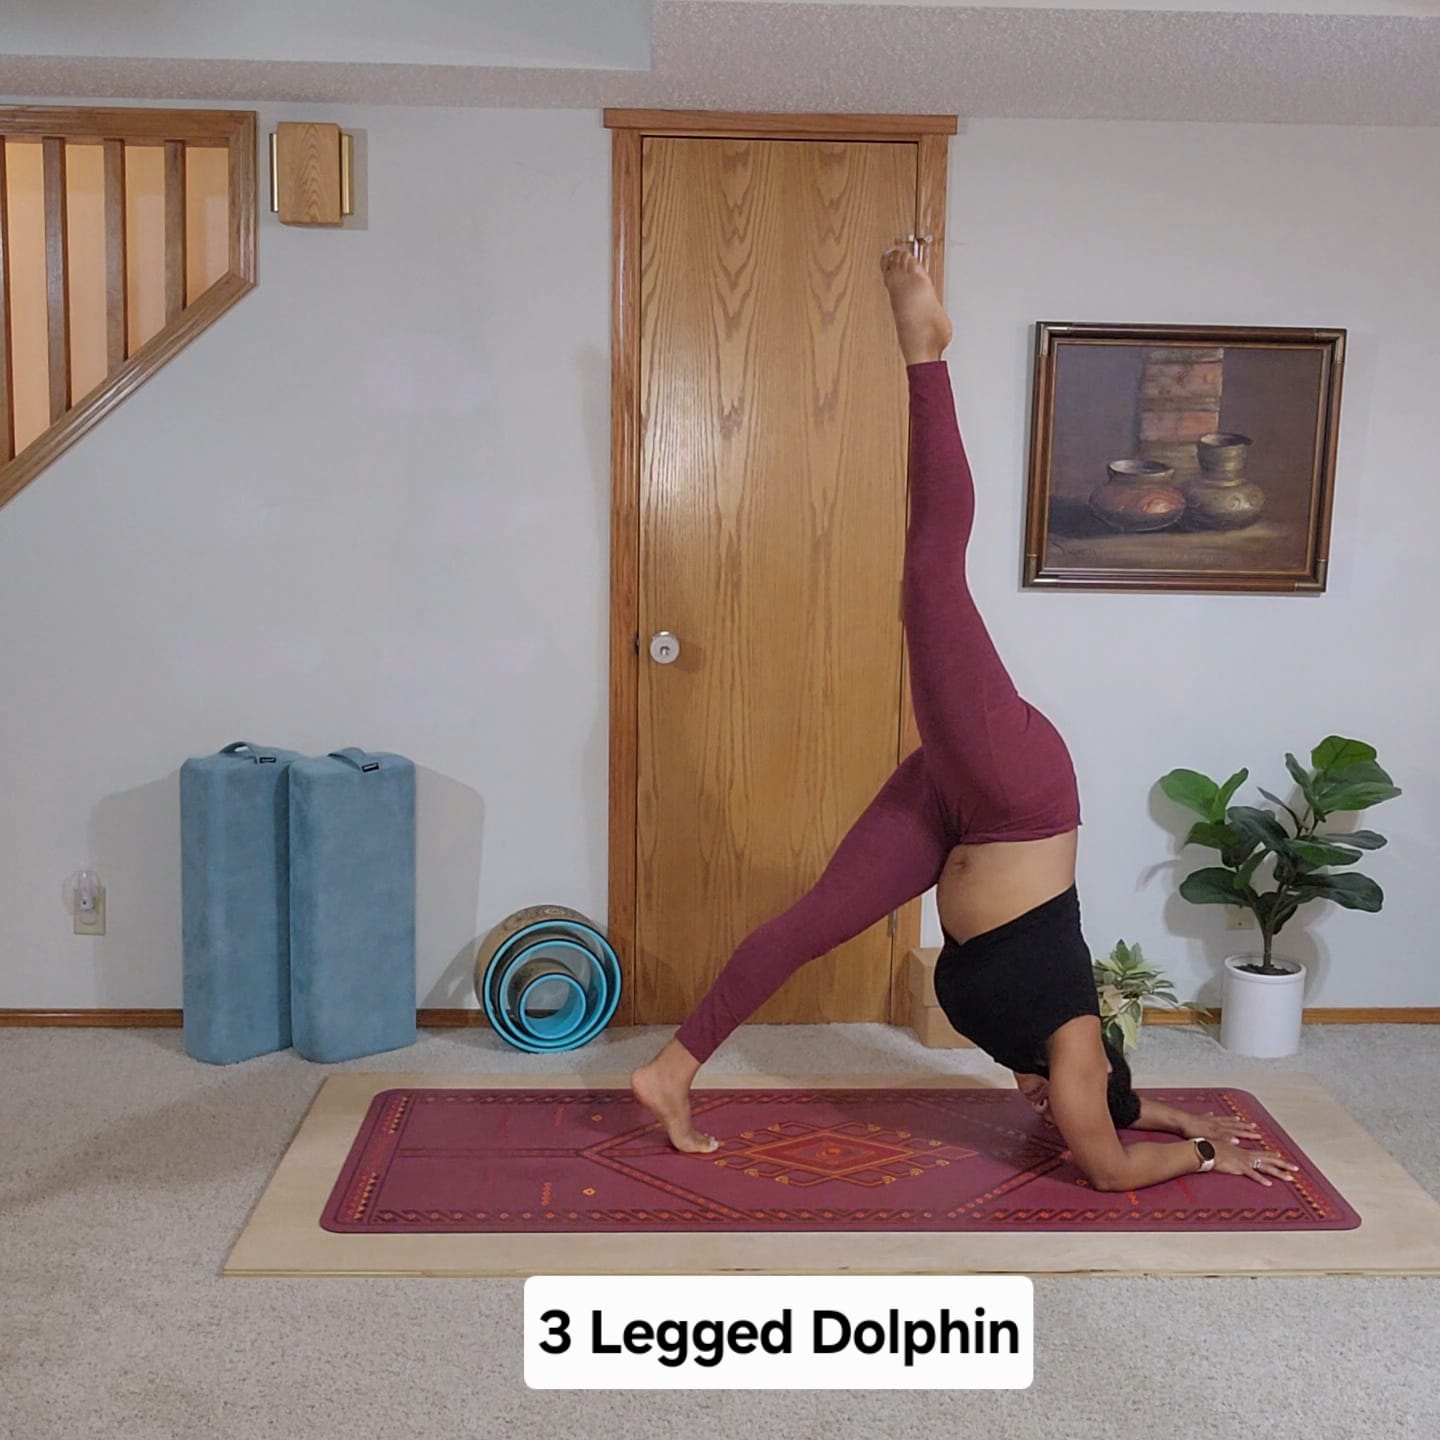
From your Dolphin pose, lift one leg up to the sky engaging your quads to straighten your leg, and reach to the sky with pointed or flointed toes (pointed foot with flexed toes). Shift to the ball of the grounded foot as you continue to push your hands and forearms into the floor and press your chest toward the back of the mat as you .
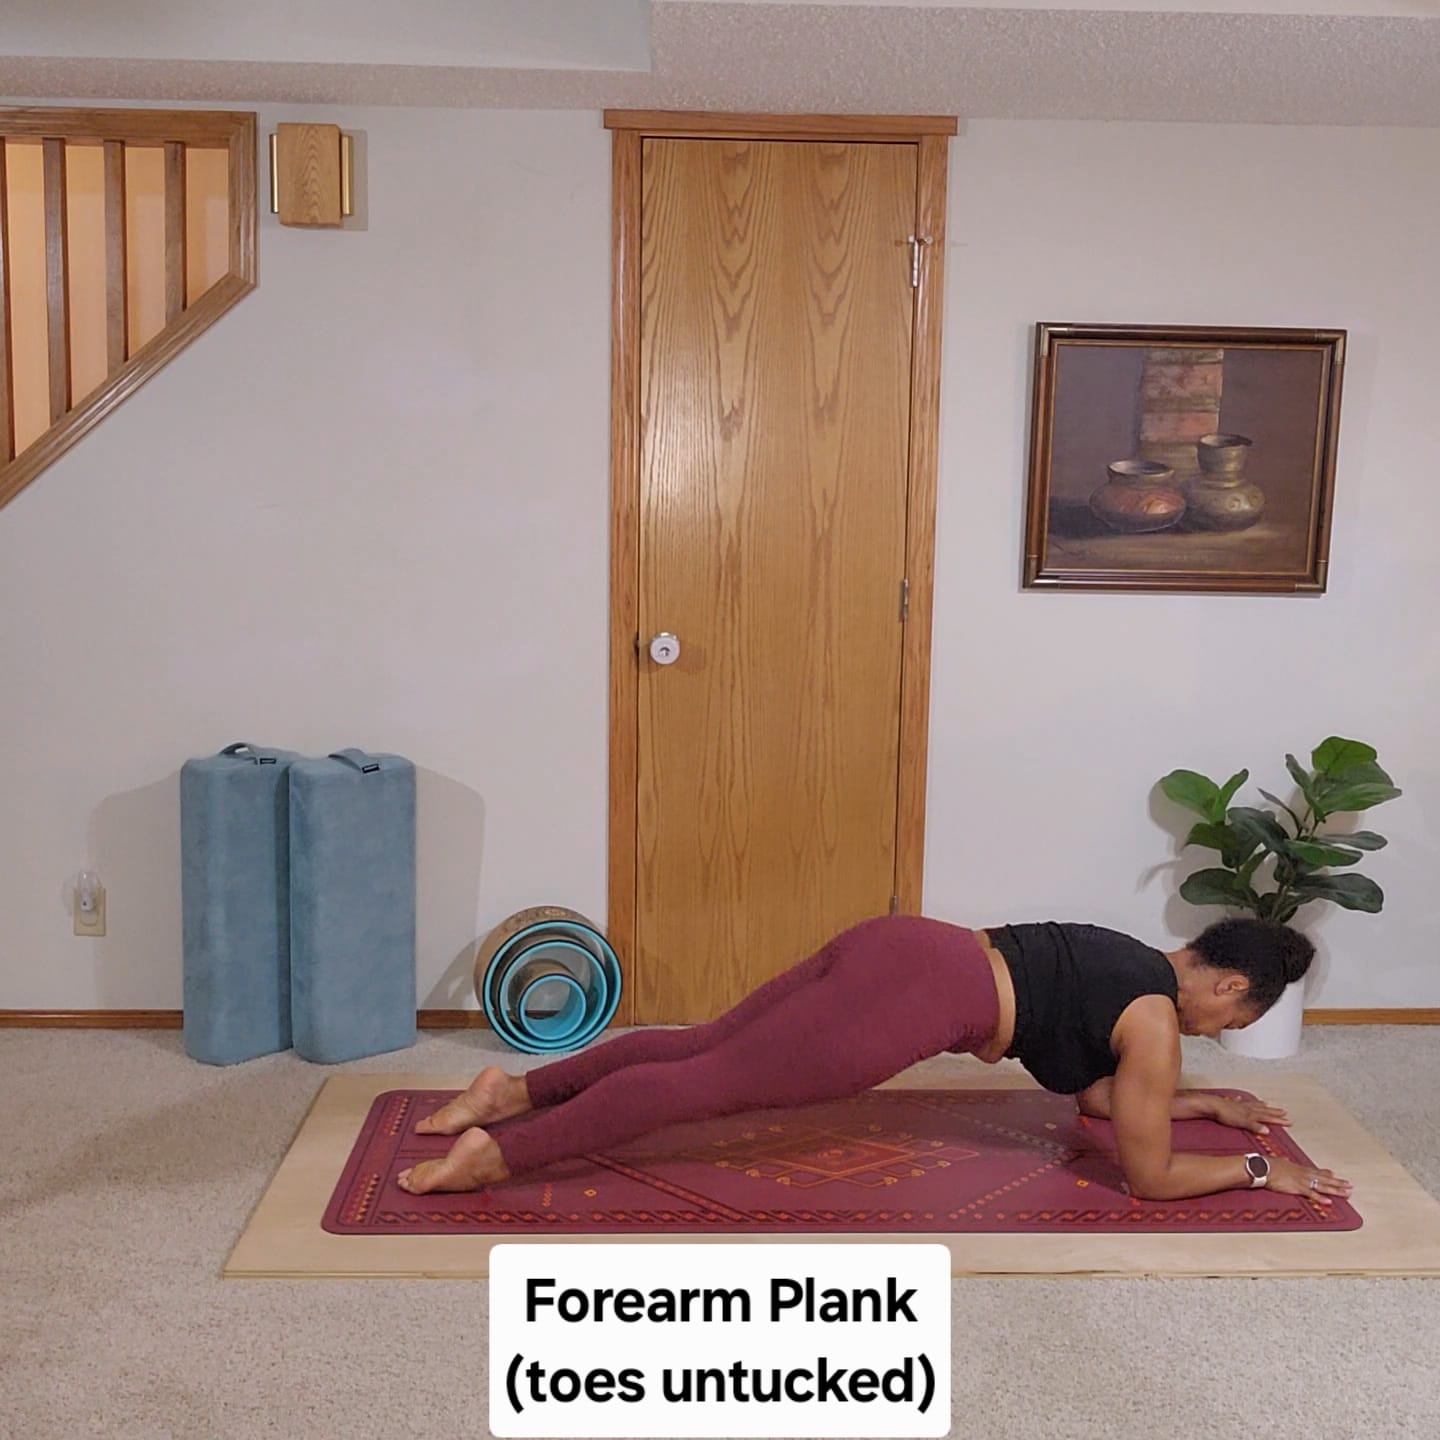
Come to lie on your belly with your shoulders stacked over your elbows and your palms face down. Keeping the tops of your feet in contact with the mat, press your forearms, hands and feet firmly into the floor as you lifts your knees and hips off of the ground. Support your spine engaging all of the muscles, front side and back to keep your back flat as you can and lengthen the crown of your head forward.
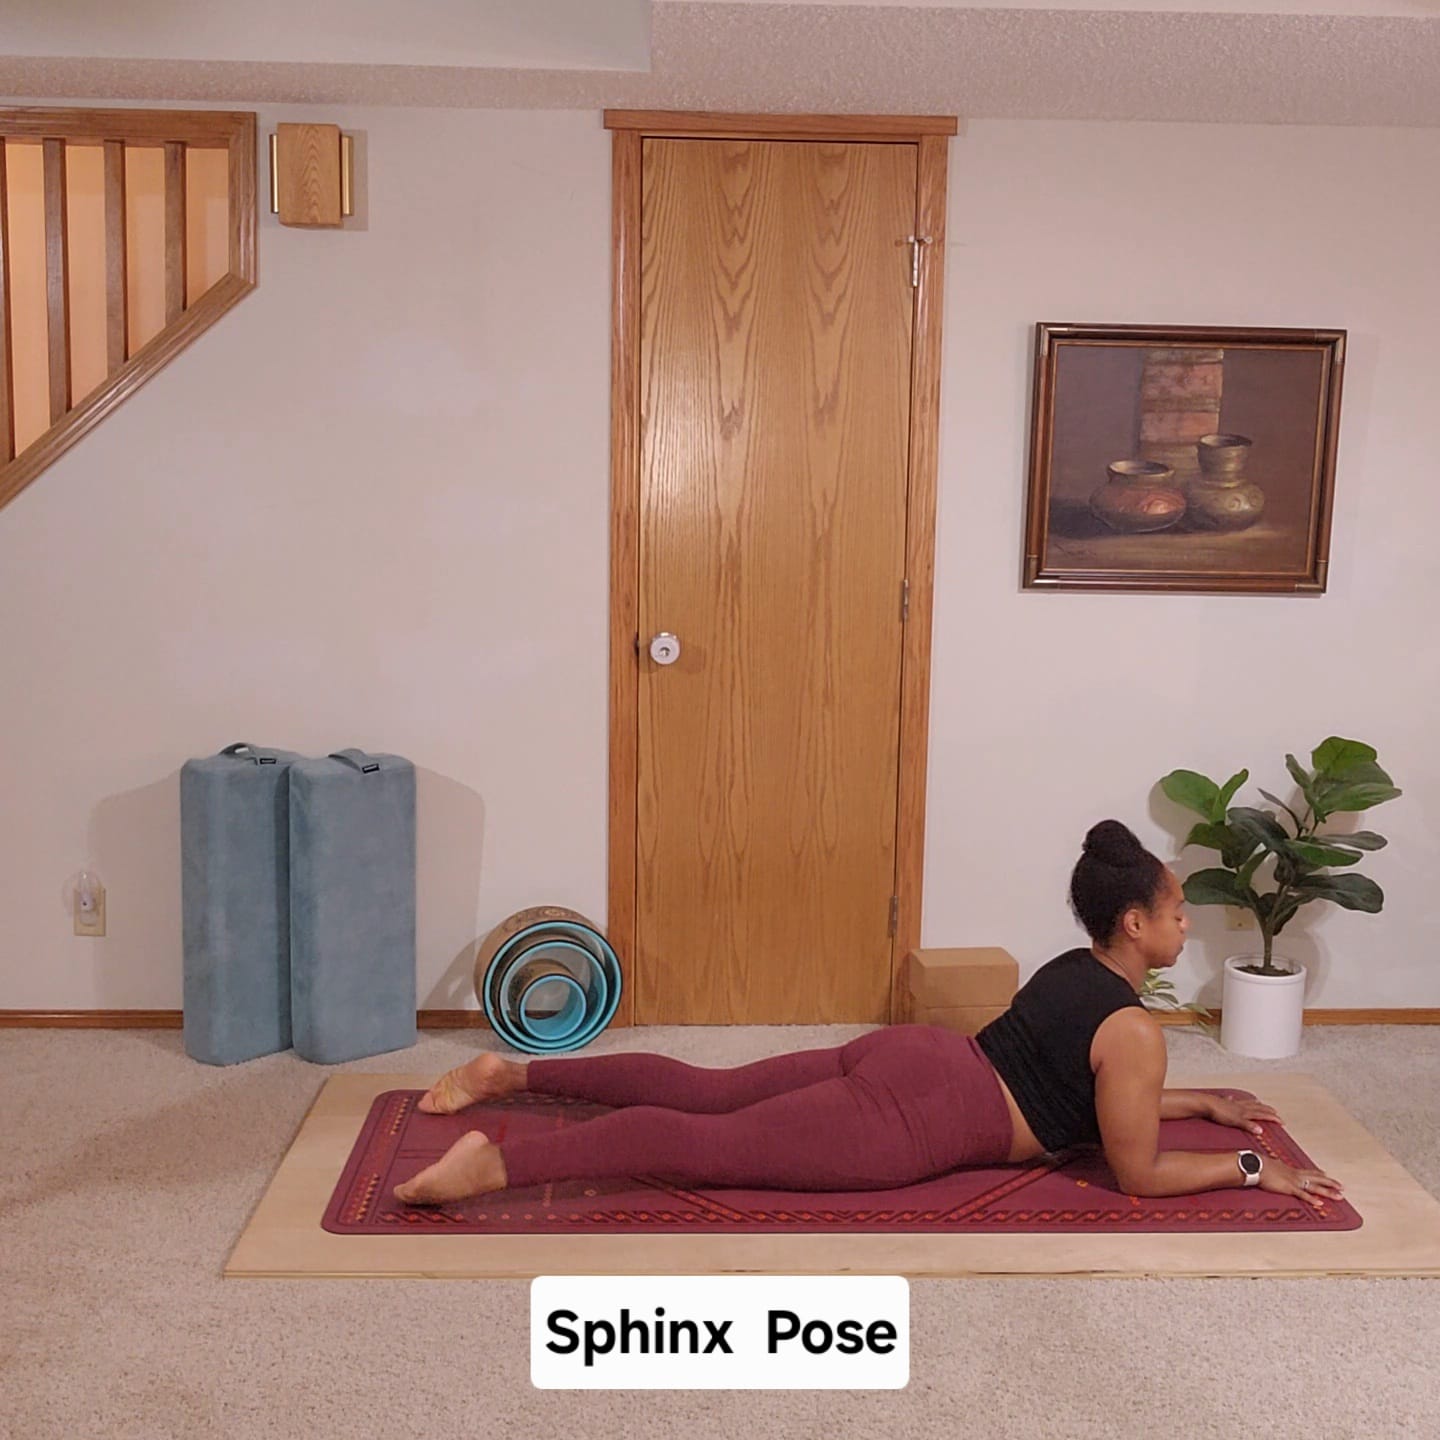
Come to lie on your belly. Place your forearms on the floor and stack your elbows under your shoulders. With your palms face down, press your hands and forearms into the floor and then pull them back toward your body. As your shoulder blades squeeze together and down toward your hips, pull your chest forward through your shoulders. Keep soft engagement of your glutes and draw your belly in to keep from dumping into your low back.
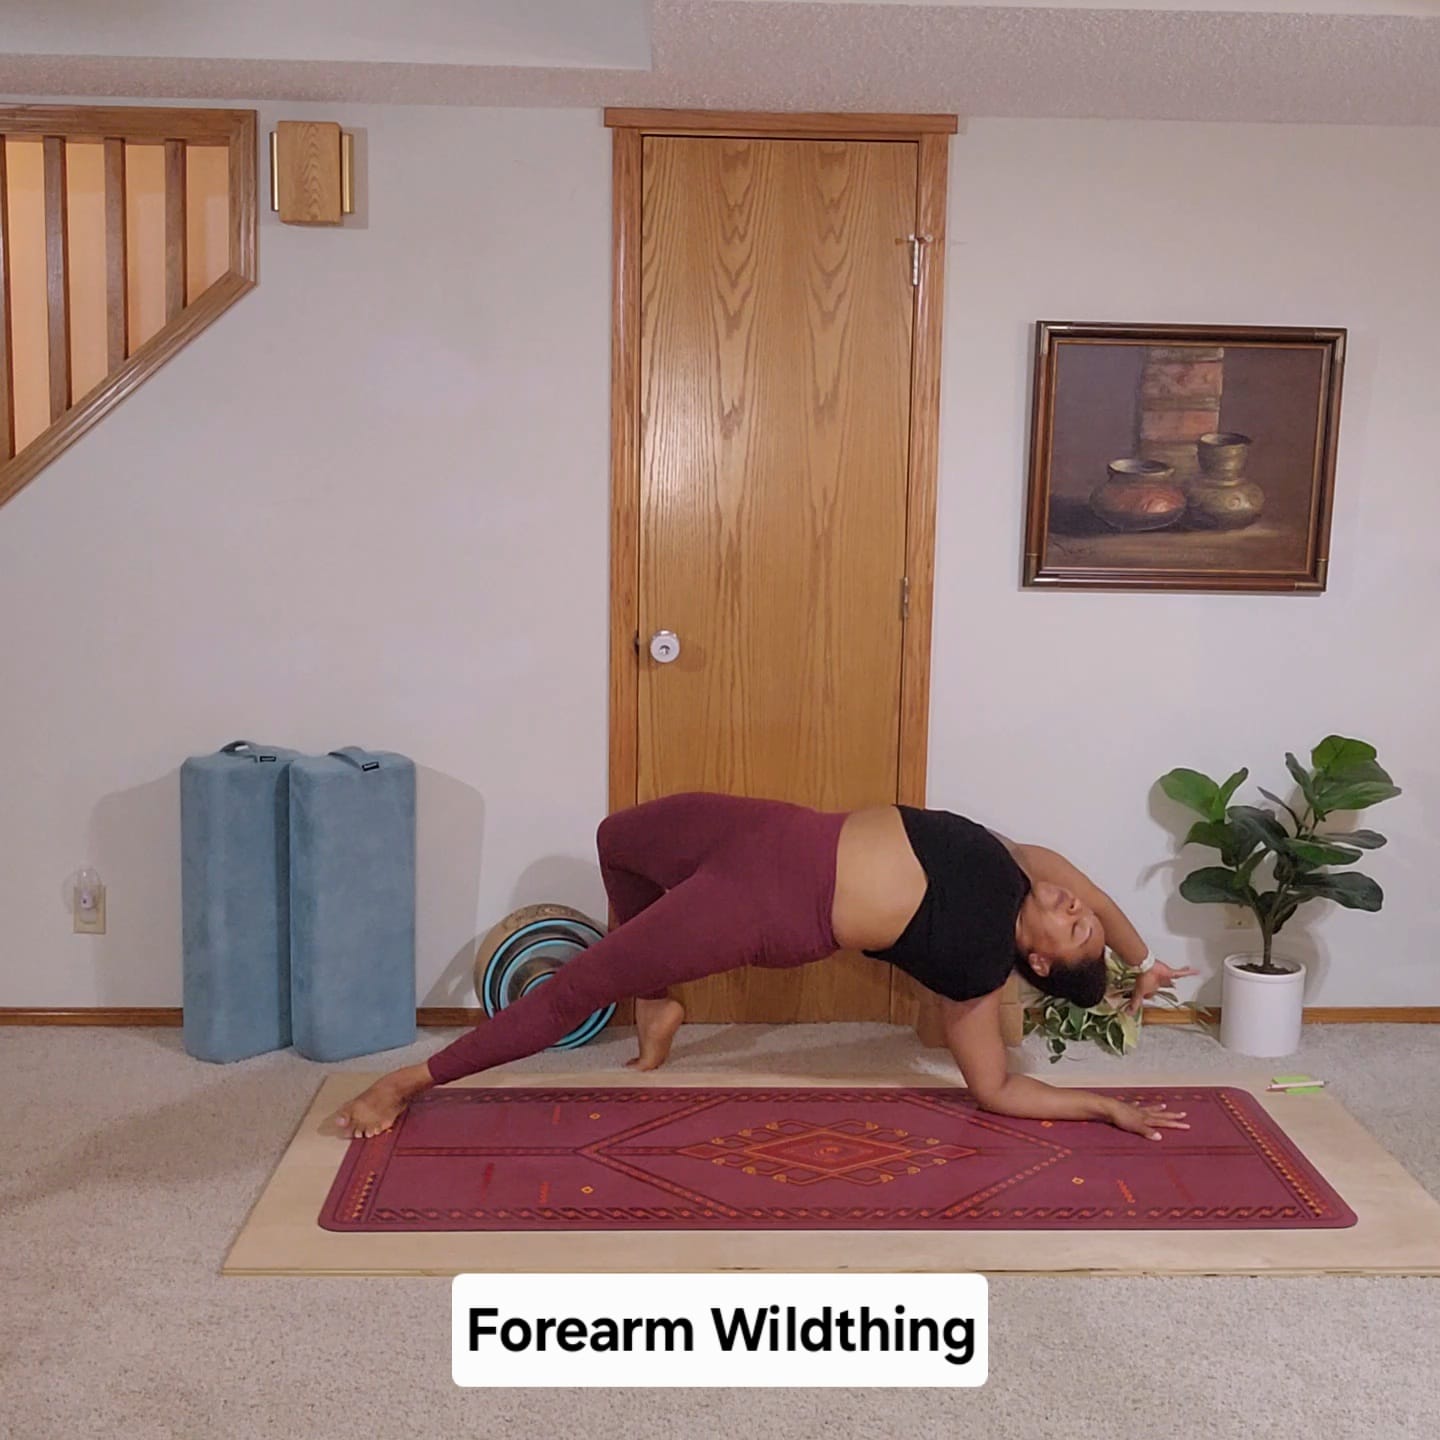
Starting in a forearm plank, shift all of your weight over to one side coming to a forearm side plank with stacked legs. Allow the top leg to continue traveling back, and kickstand the ball of your foot on the floor as you reach you top arm up and over head. Press your grounded forearm into the mat as your rotate your chest skyward finding and arch in your upper back.
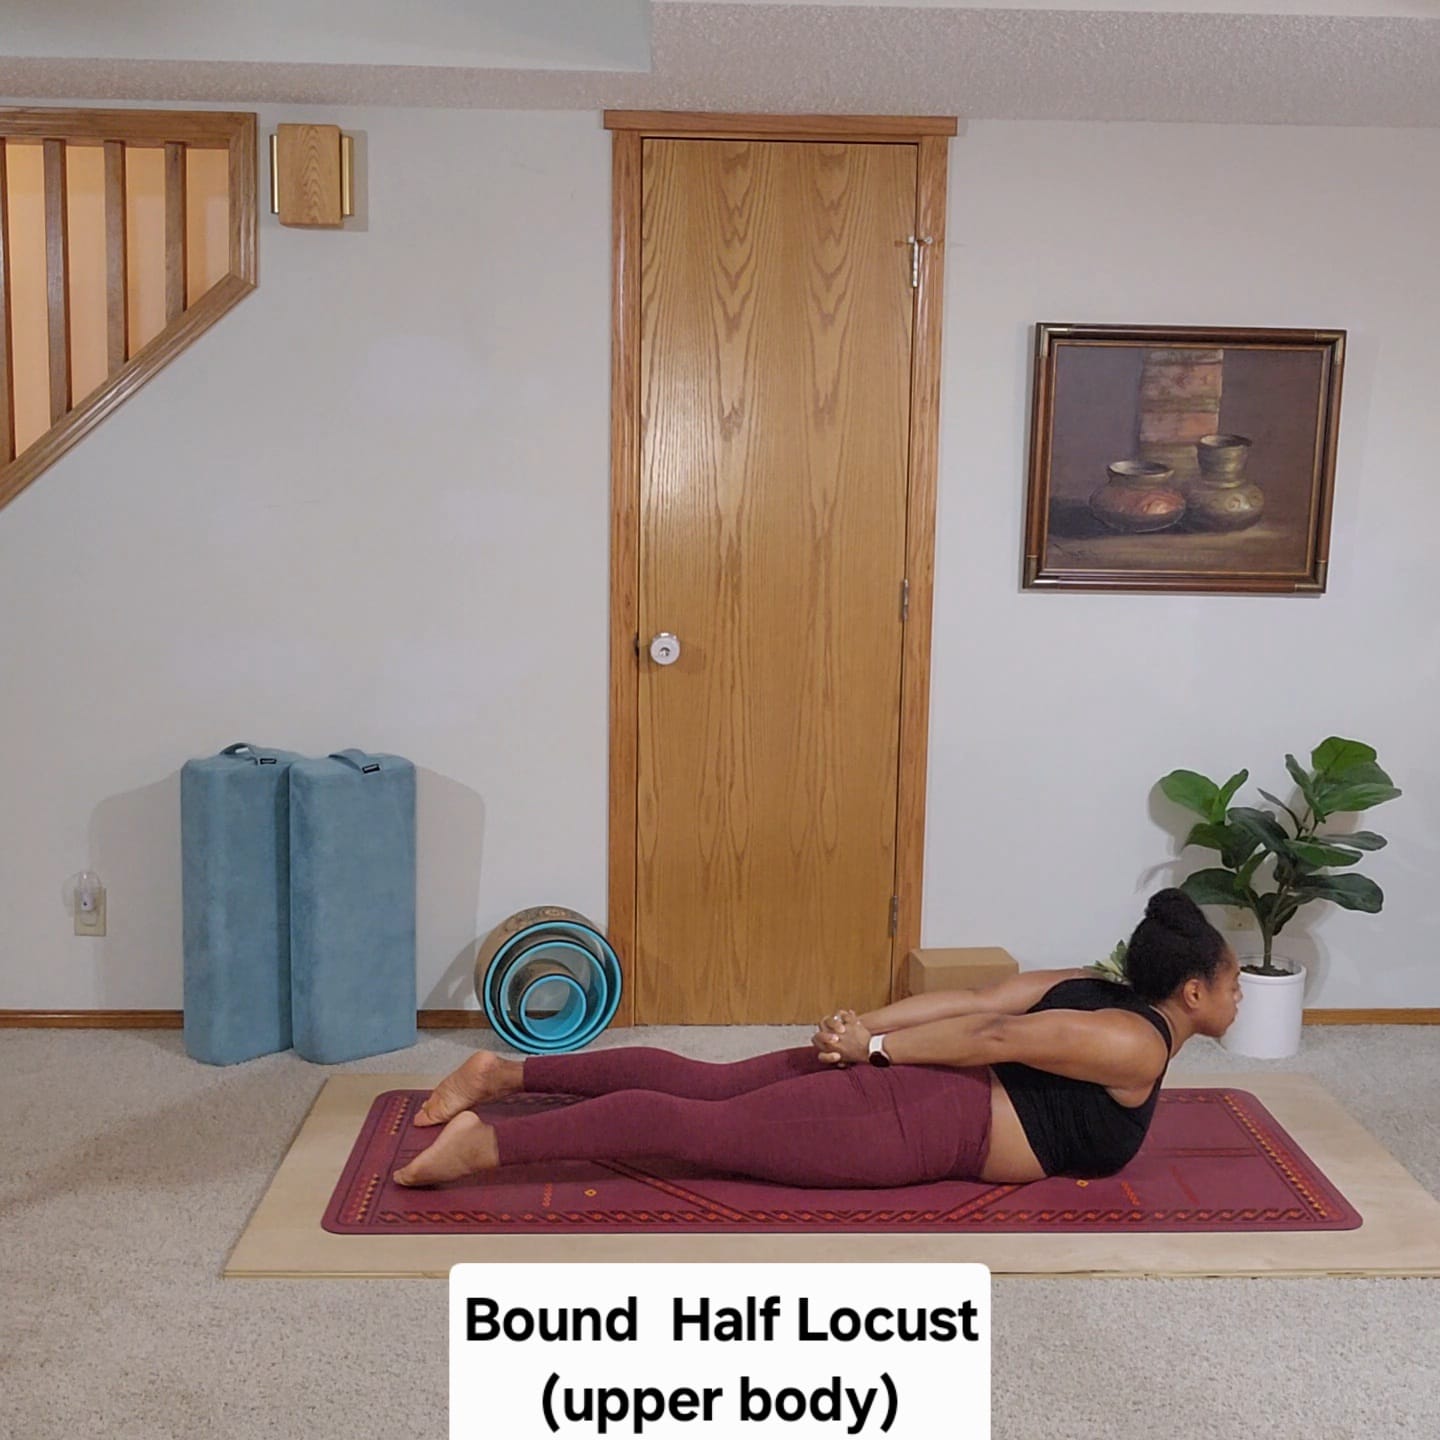
Come to lie on your belly. Bring your hands behind your back and interlace your fingers. Draw your belly in to support your low back as you peel your chest off of the floor squeezing your shoulder blades together toward the center of your back. Take your gaze forward as you engage your triceps to straighten your arms as you reach your knuckles toward your feet.
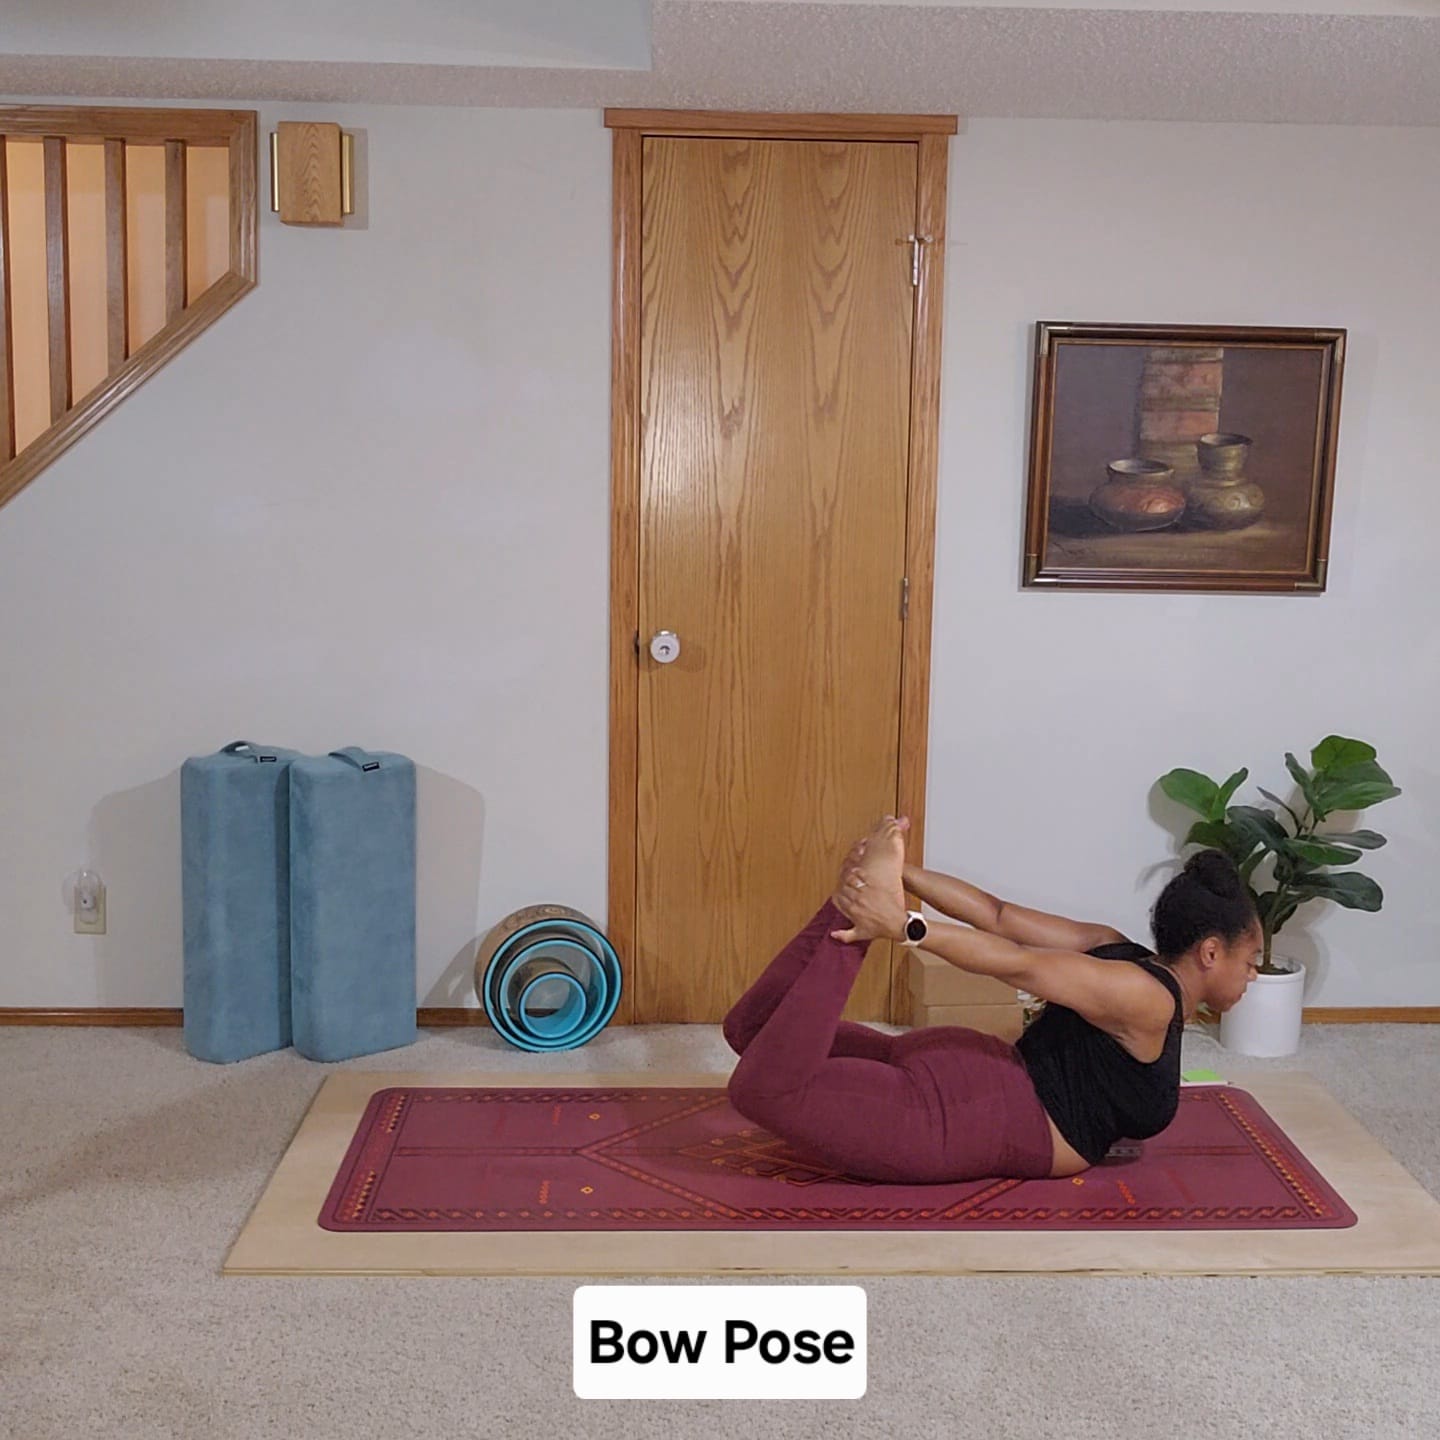
Come to lie on your belly. Bend one knee pulling your heel toward your glute. Reach back with the same side hand and grab the top of your foot or your ankle. Keep holding your foot and repeat on the second side. Once you have ahold of both feel, draw your belly in to support your spine as you simultaneously lift your thighs and your chest, pulling your shoulder blades together as your reach your chest forward. Think of lengthening your spine forward and back before arching, keeping your gaze forward.
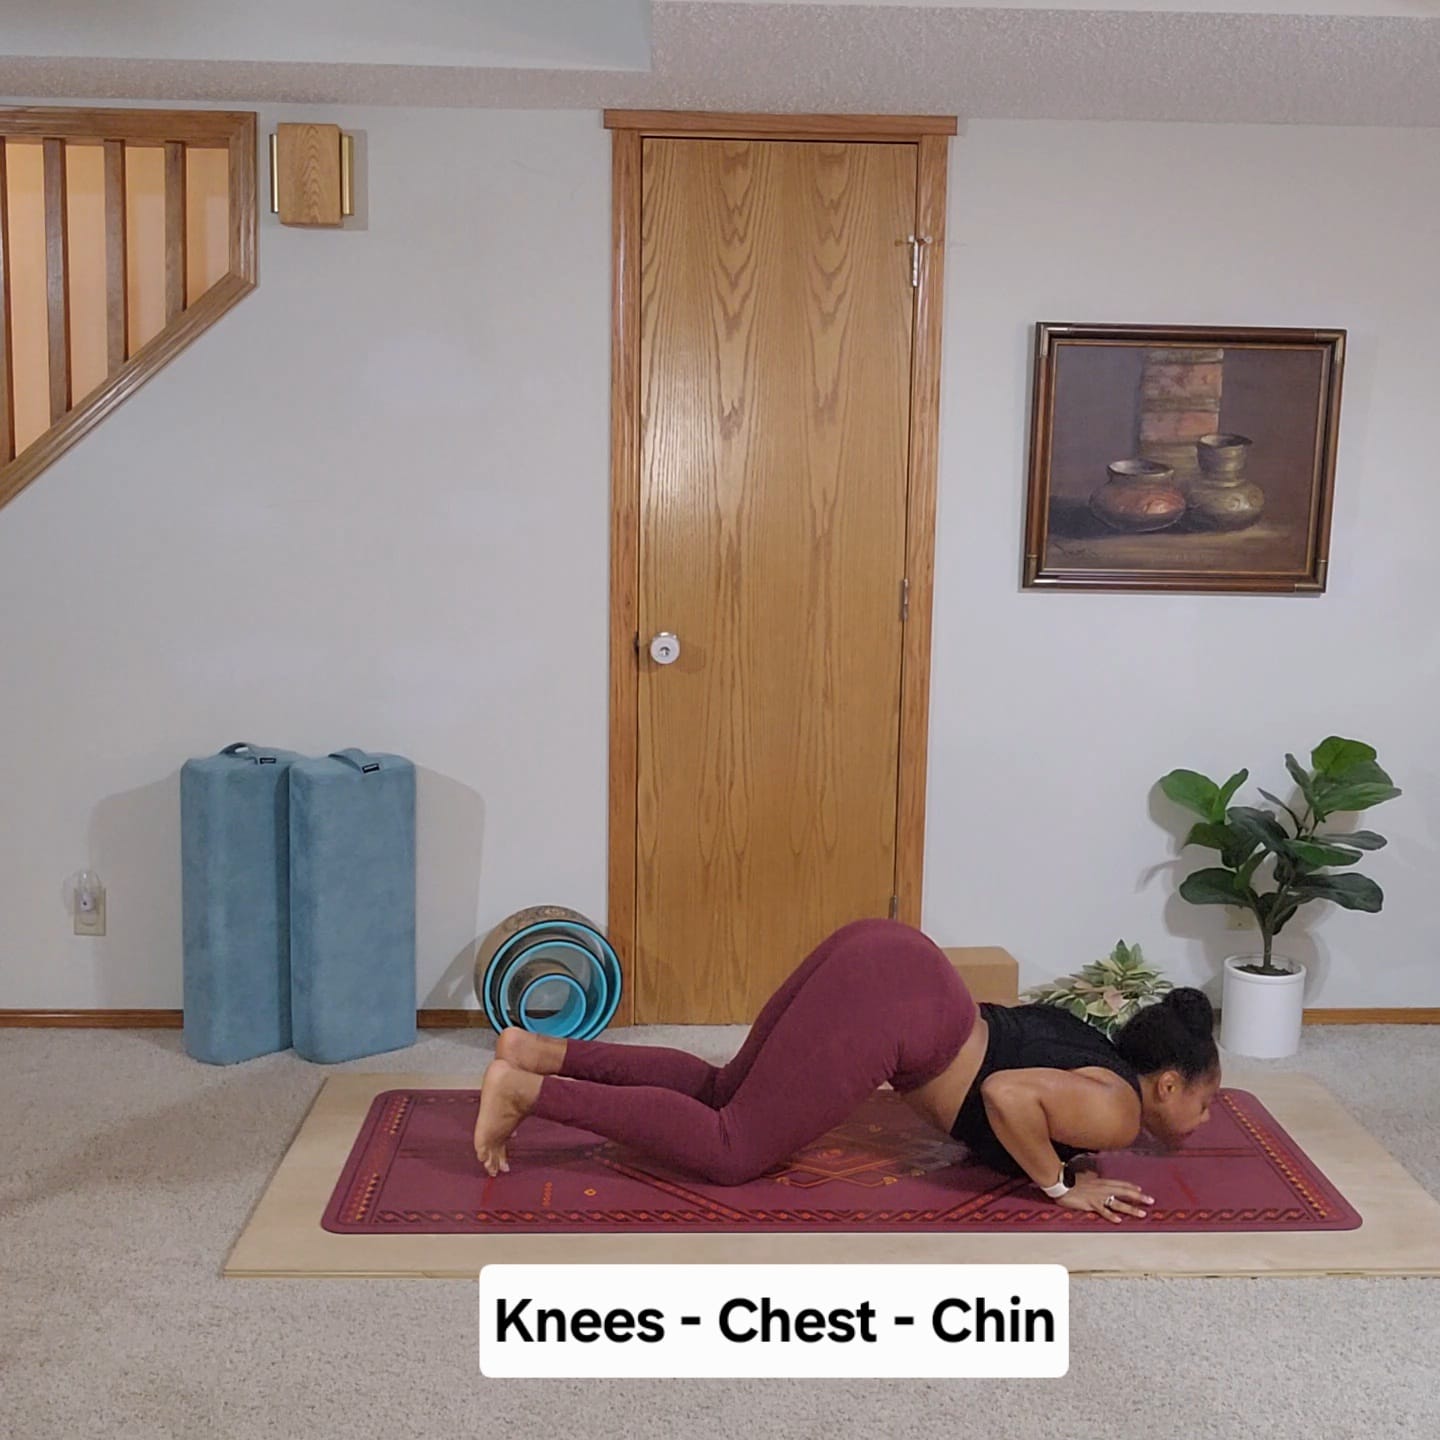
Starting in a table top position with your hips stacked over your knees and shoulders over your wrists, keep your hips high as your lower your chest and chin down to the floor creating an arch in your upper back.
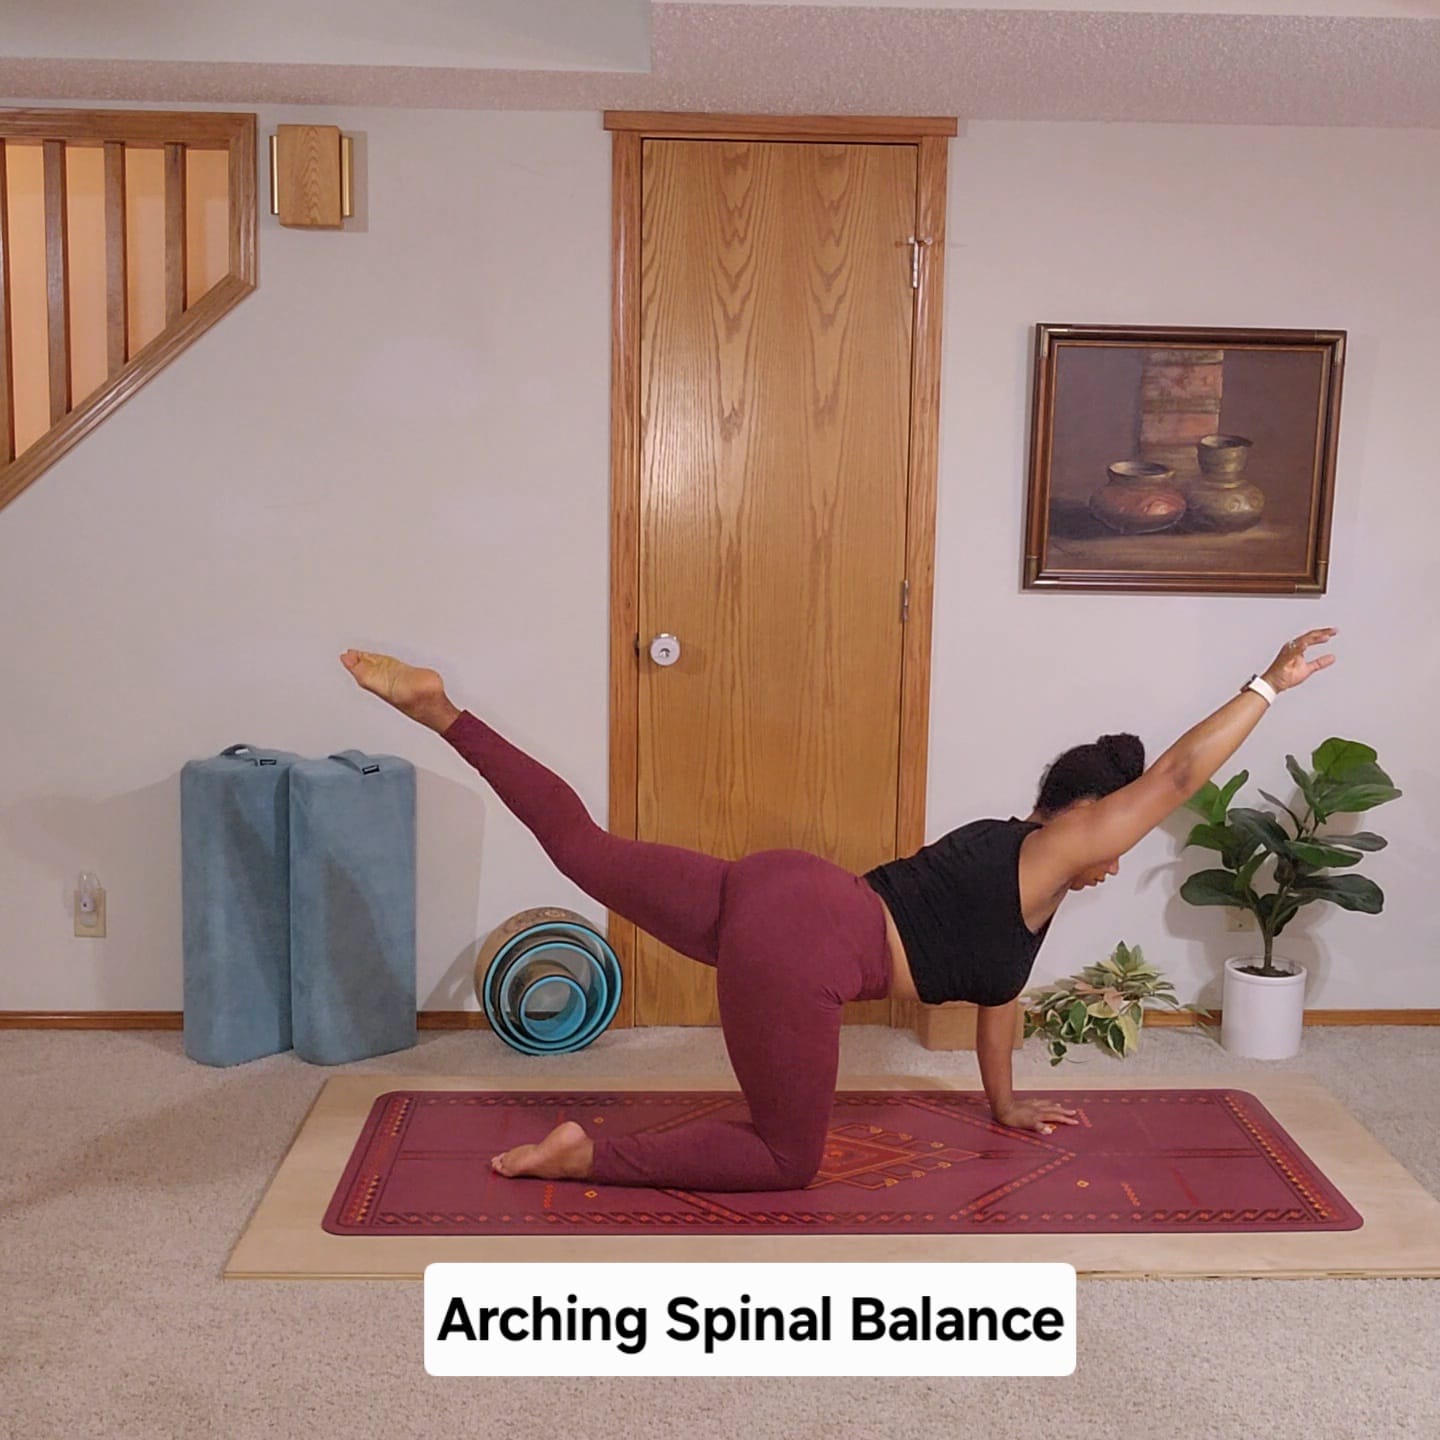
Starting in a table top position, reach one leg behind you and the opposite arm forward. Keeping the lifted leg straight, continue to lift the leg higher by engaging the glutes. The lifted arm reaches forward and up creating an arch in the mid and upper back. Keep drawing the belly toward the spine to keep from dumping in the low back.
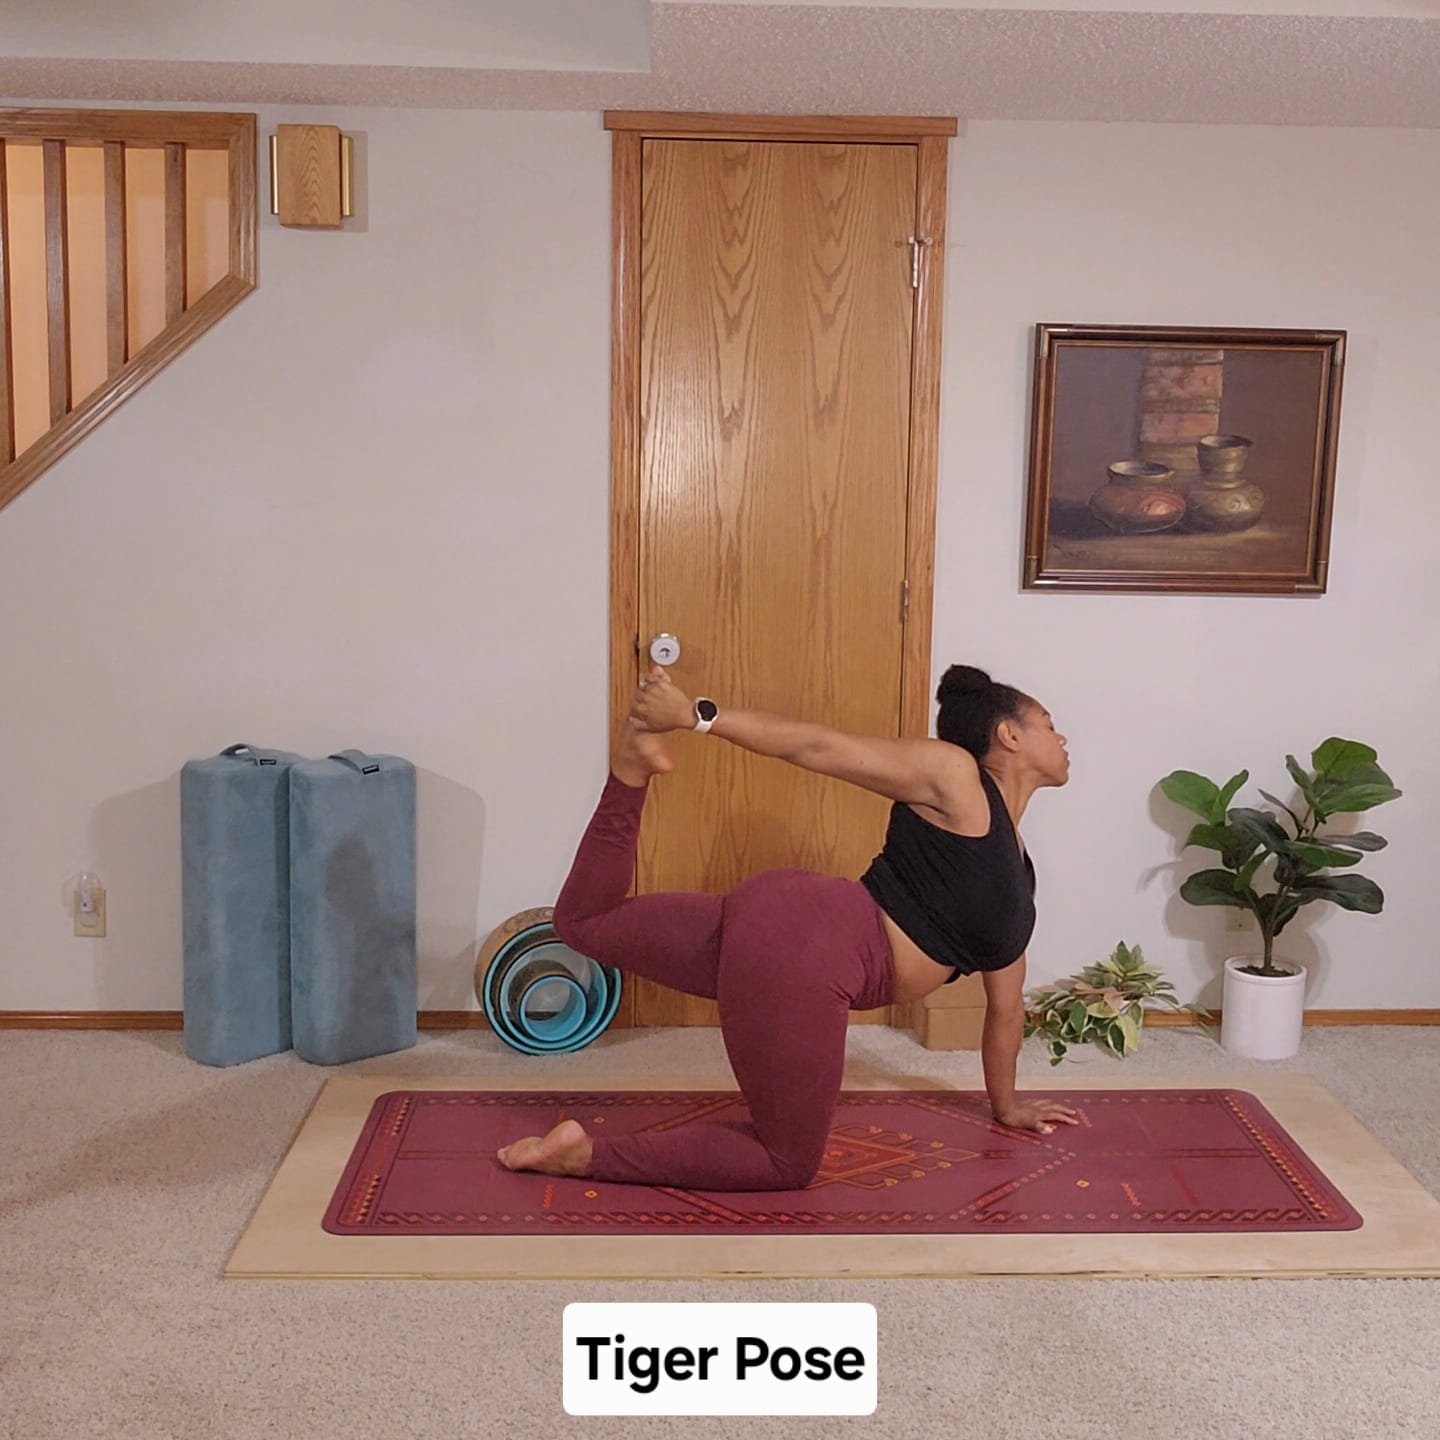
From a table top position, send one leg back and bend the knee. Reach the opposite had back to grab the foot. Press your foot into your hand as your pull your hand against your foot as you continue to send the chest forward and lift the back leg higher.
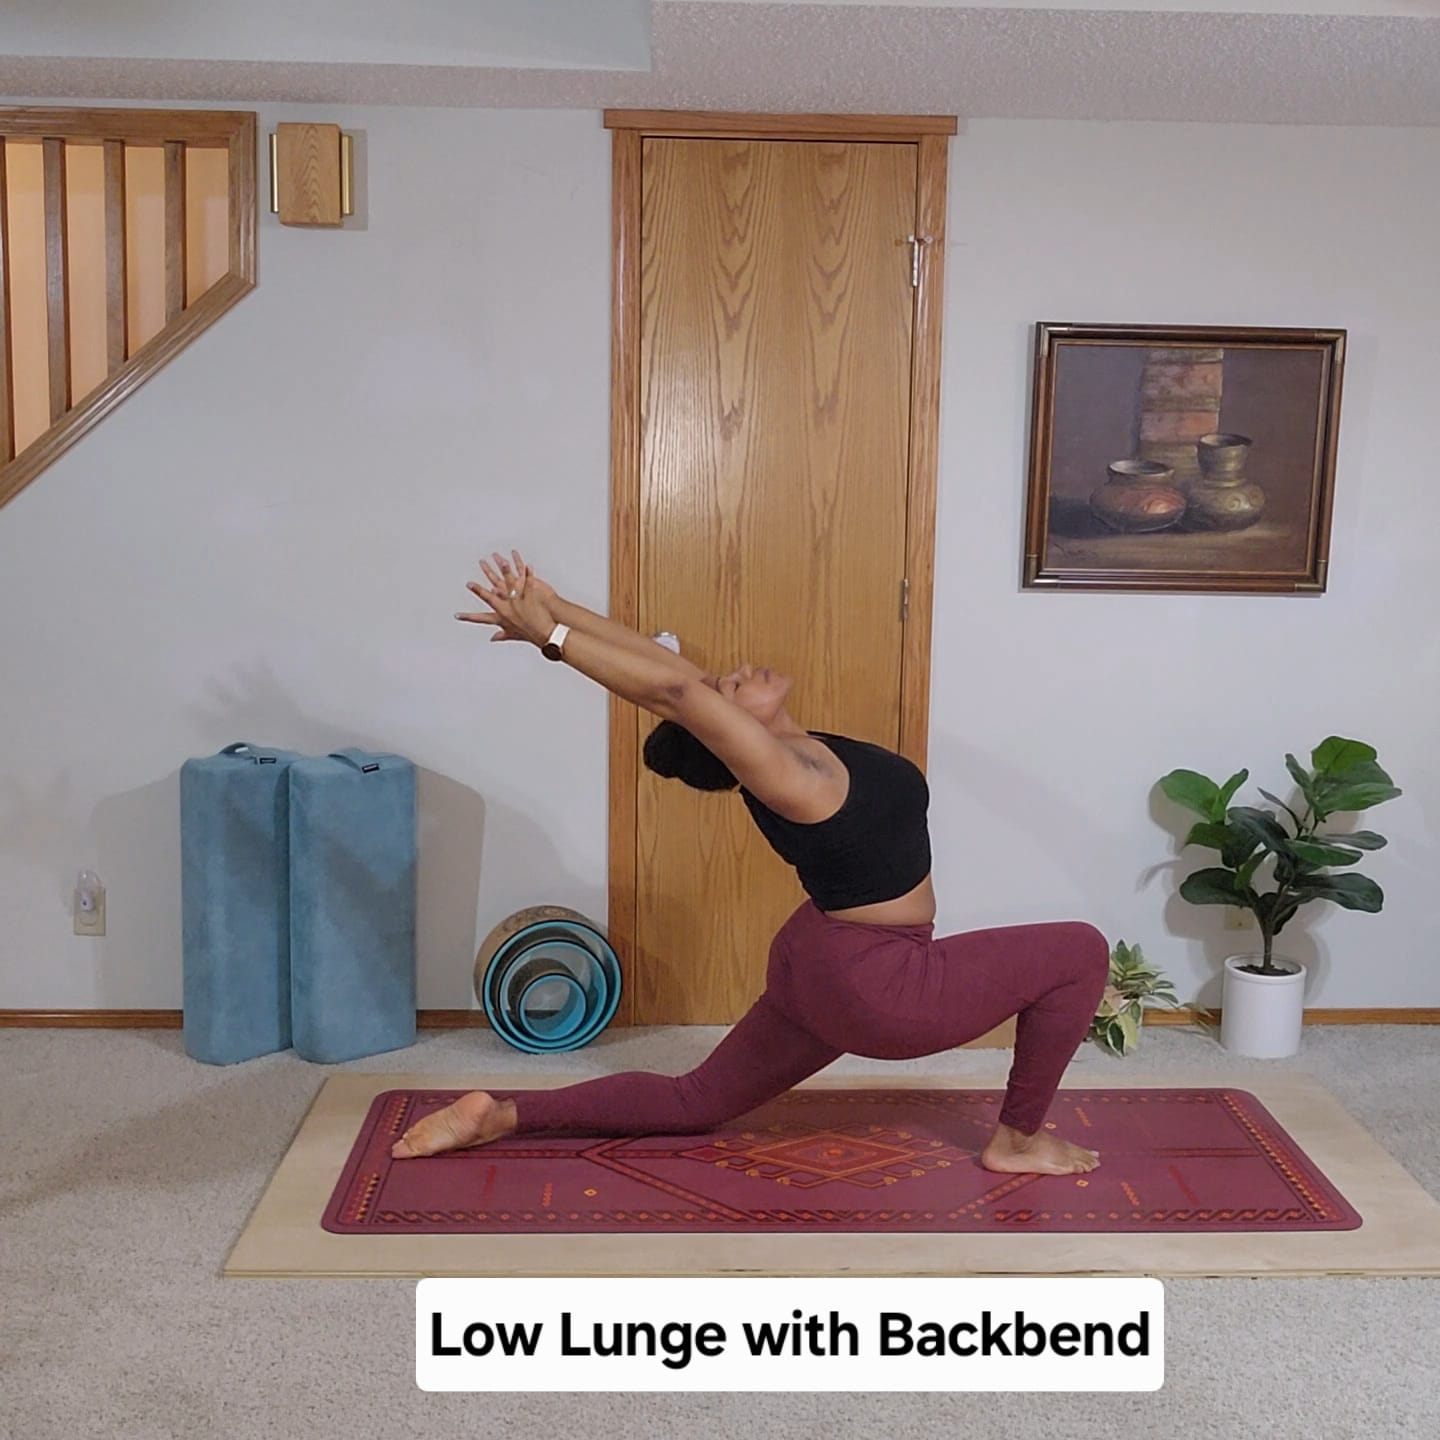
Starting in a Downward Facing Dog, lift one leg and step it in between your hands and lower your back knee. Reach your arms up and overhead arriving in a low lunge. Start to send the back hip forward and down as you lengthen your spine up and then back creating an arch in your upper back taking your gaze upward lifting your chin forward and up.
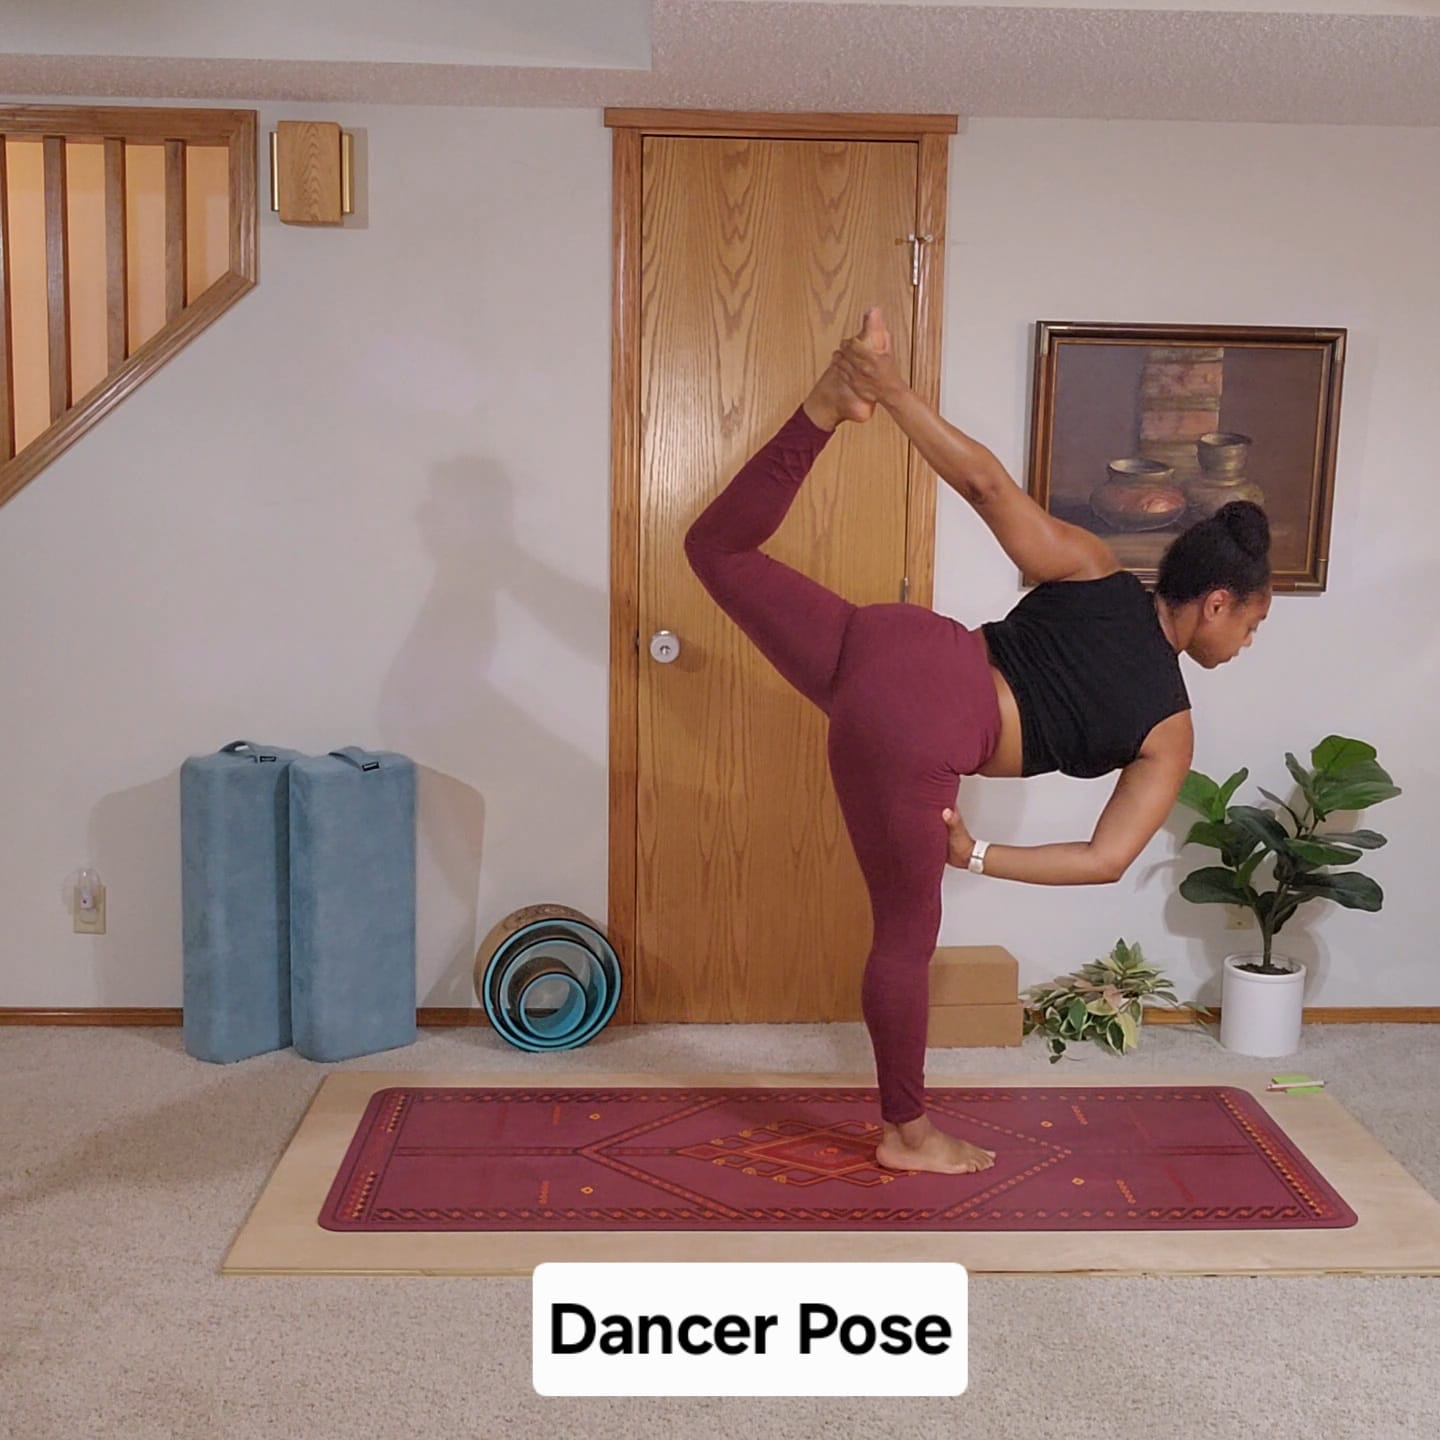
Starting in Mountain Pose, stand firm on one foot as you bend the other knee pulling your heel to your glues. Reaching back with the same side hand, grab ahold of your foot. Start to kick your foot into your hand as your pull your hand against your foot. As you slowly start to slightly hinge forward at the hip, keep the spine long as your reach your chest forward while continuing to lift the back leg. Option for the free hand to reach forward or rest on your upper leg.
While these poses are a great way to prep your body, they are by no means the only poses that can help you warm up for Scorpion Pincha. So feel free to add and or take away any other poses that you like.
When you are nice and warm, it's time to put all of the elements together. Here are some key points to consider when playing with your Scorpion Pincha.
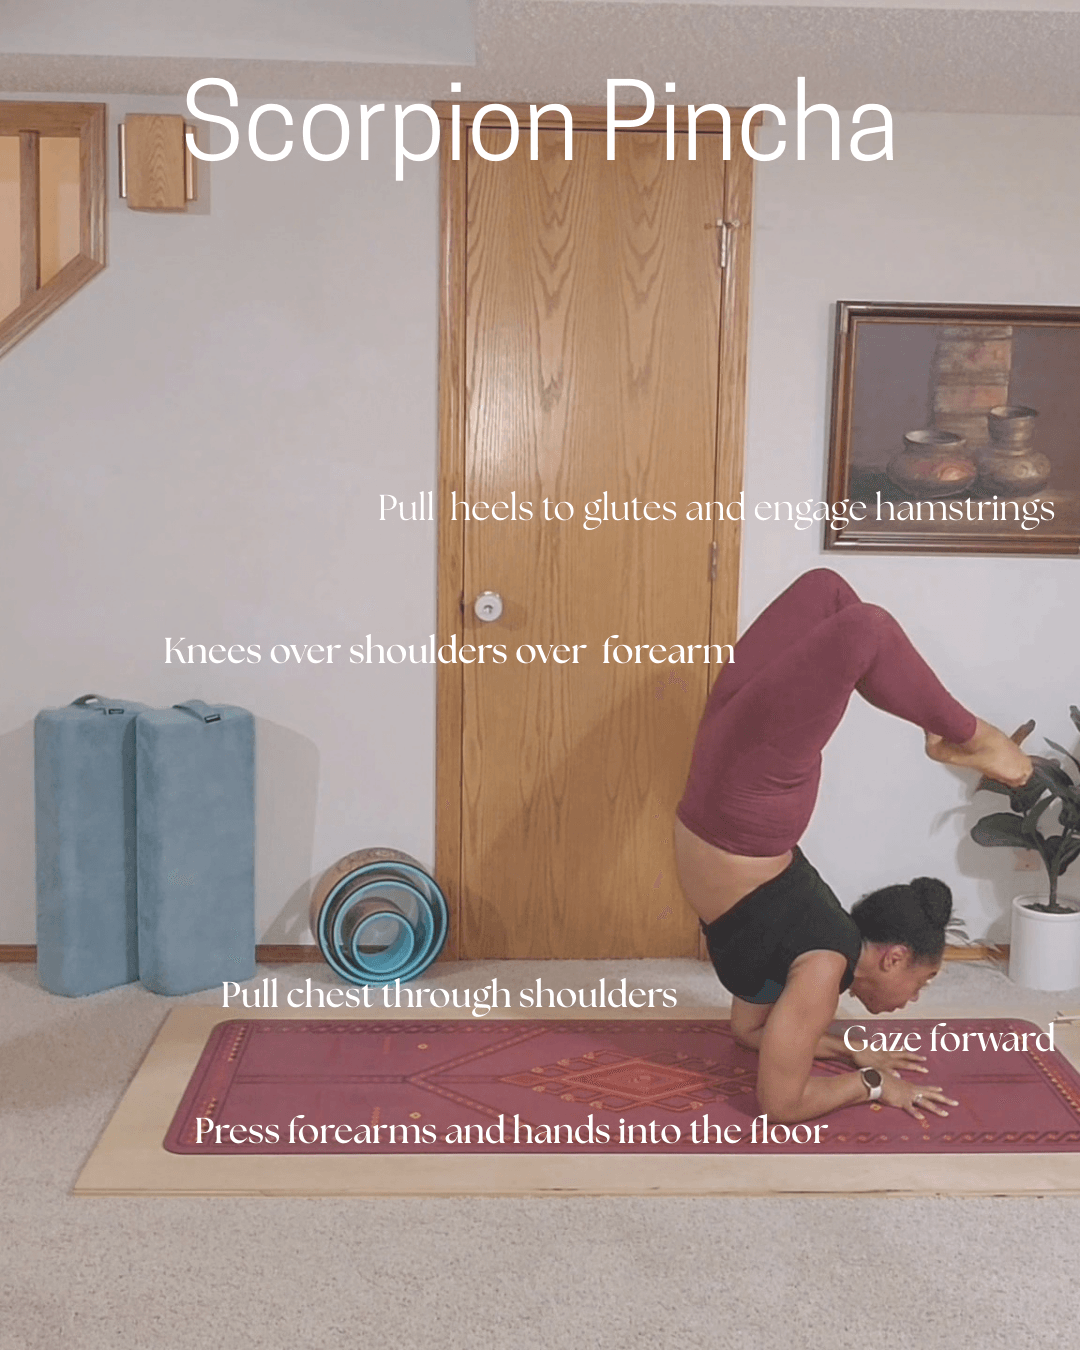
Differences Of Balancing In Straight VS Scorpion Pincha
For some people, scorpion will be easier than straight, while for others the opposite is true. Every body is unique and different. I have discovered that for myself, finding the shape that is easiest for me to balance first, is often the gateway to unlocking other variations of the same inversion. Be patient with yourself and keep practicing.
Written by:
Charyl Dezotell
Follow Me: phoenixfityoga across all platforms








About me
Hi there 👋 My name is Charyl Dezotell. I'm the maker of This Blog. Here to share tips, tricks and all things yoga :)